How to fold a paper snowflake like a pro
The folding is the most important part of cutting a paper snowflake. I’ll repeat that again: the folding is the MOST important part of cutting a paper snowflake! If you’re sloppy with your folding, you may end up with just a bunch of paper scraps!
Here’s my method for folding (there are many different ways, but I like this one best).
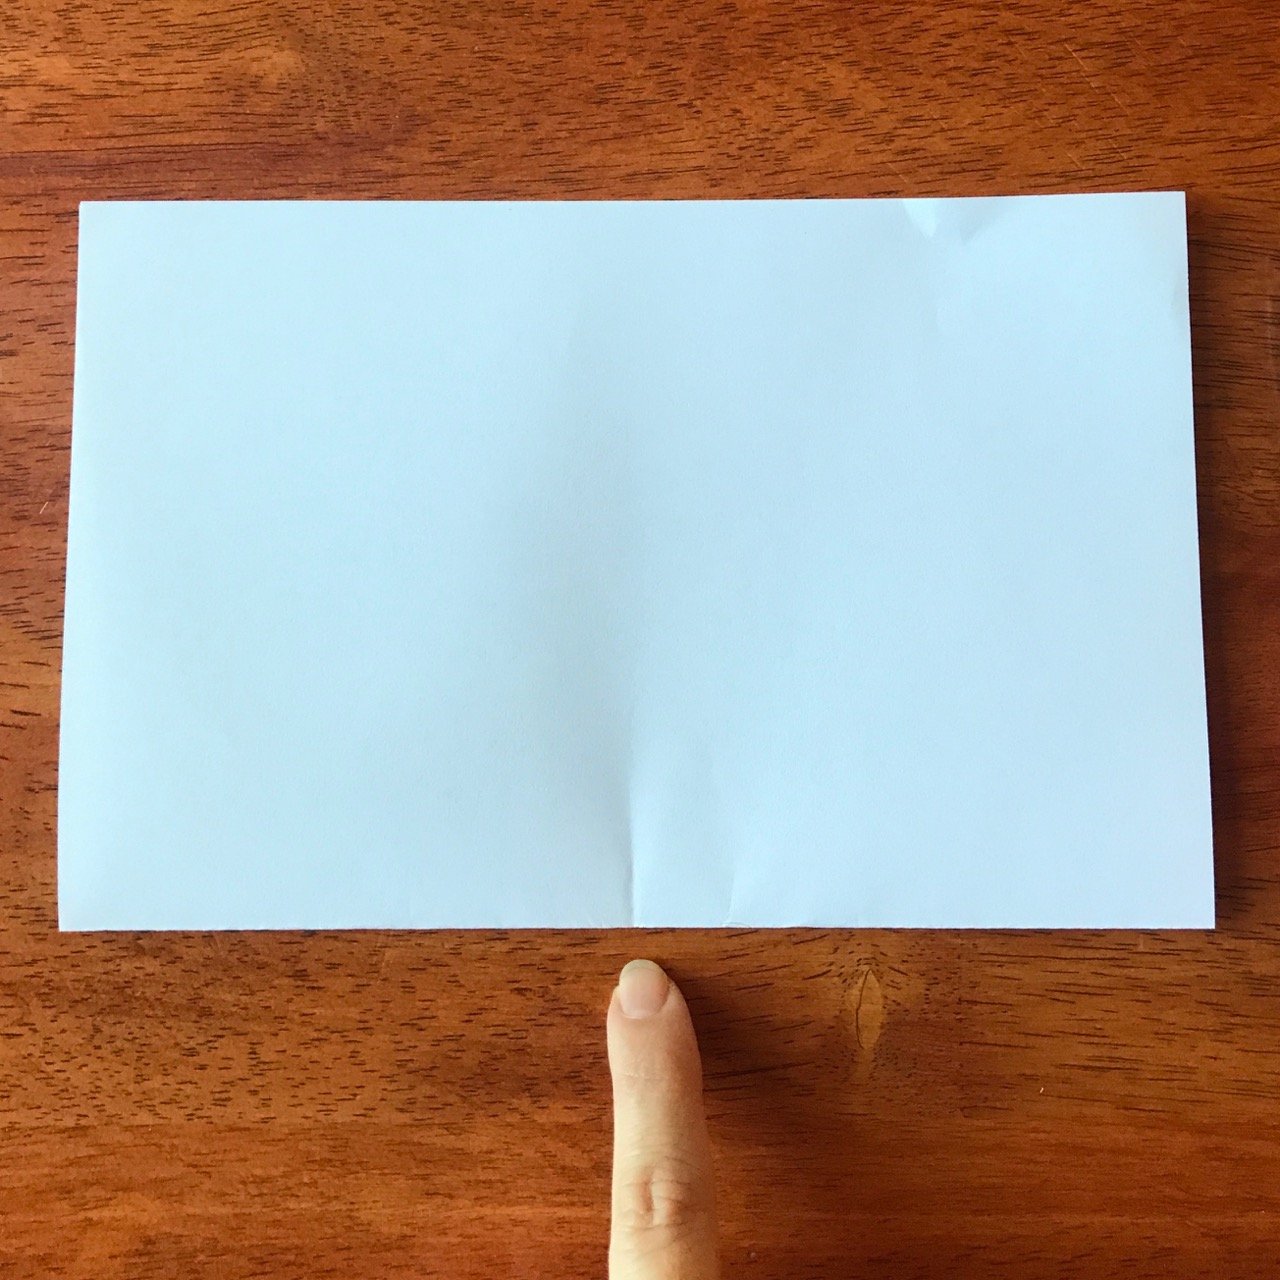
1) Begin by folding your piece of paper in half, short edge to short edge.
Fold it in 1/2 again, just enough to make a tiny fold right in the middle of your paper. This little notch will mark the center of your paper, and should be along the first fold (not on the side with two open ends). After you make that mark, open up your paper again so it is only folded in 1/2 once.
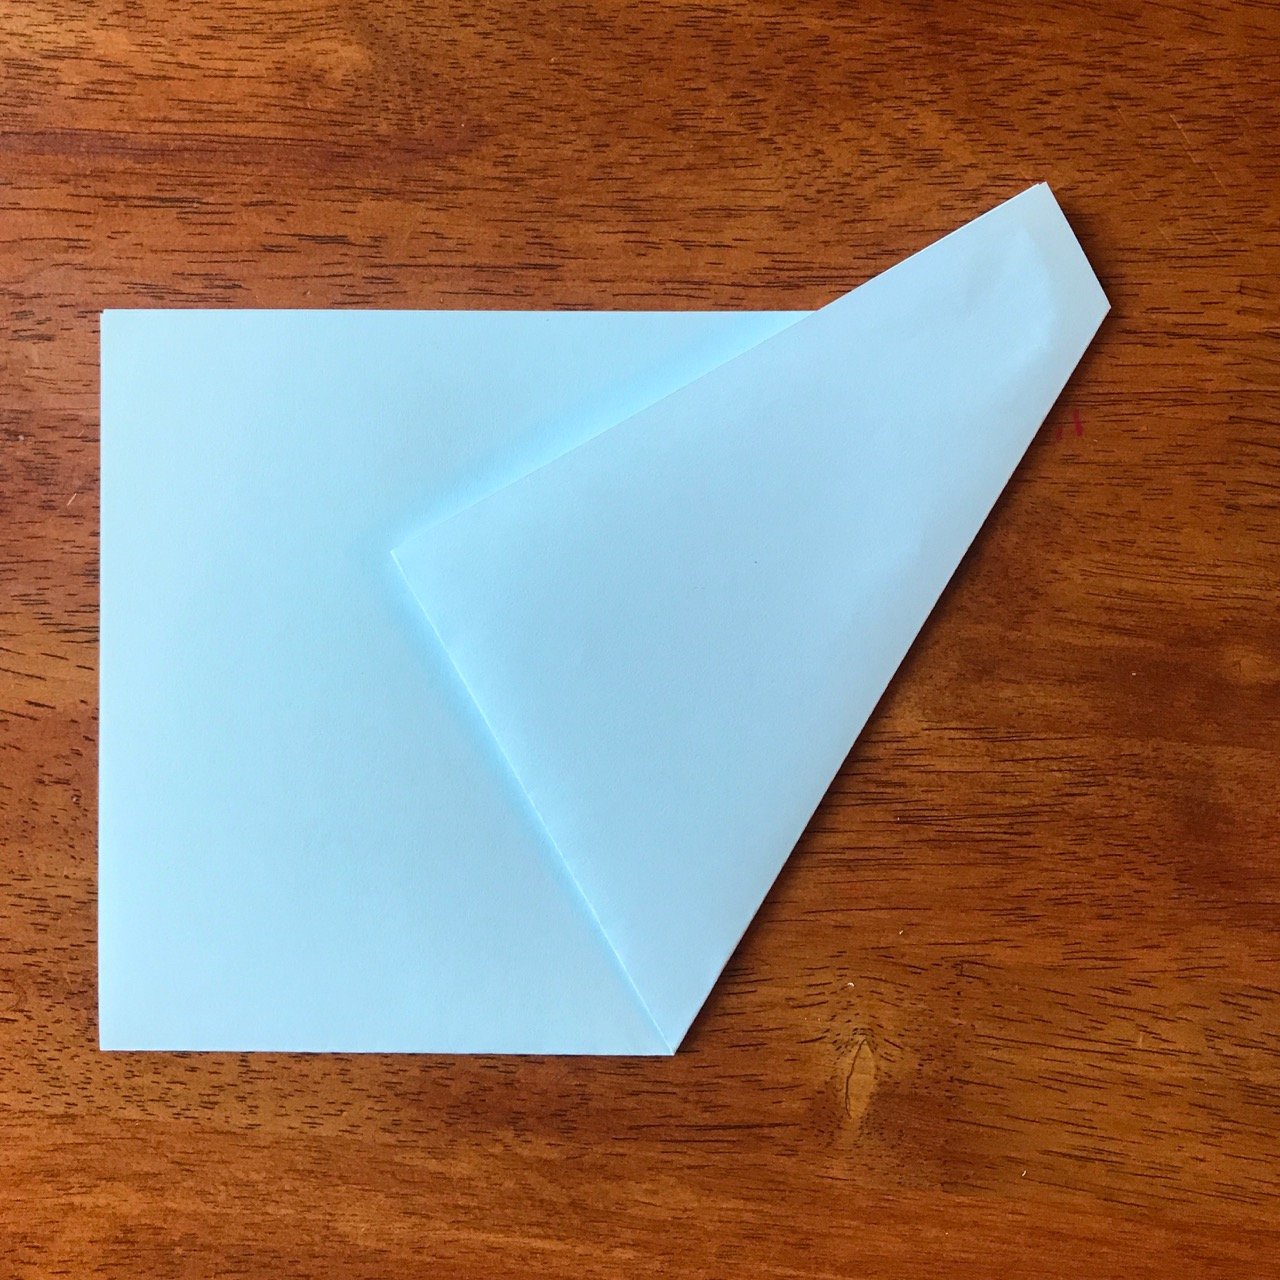
2) Fold your first angle
Your next fold will be on an angle, starting from the notch in the middle of your paper. Take the bottom right corner, and fold it toward the top left corner. Aim the corner of your paper about 1 inch inside of the top left corner. Again, check the photo to see what I mean.
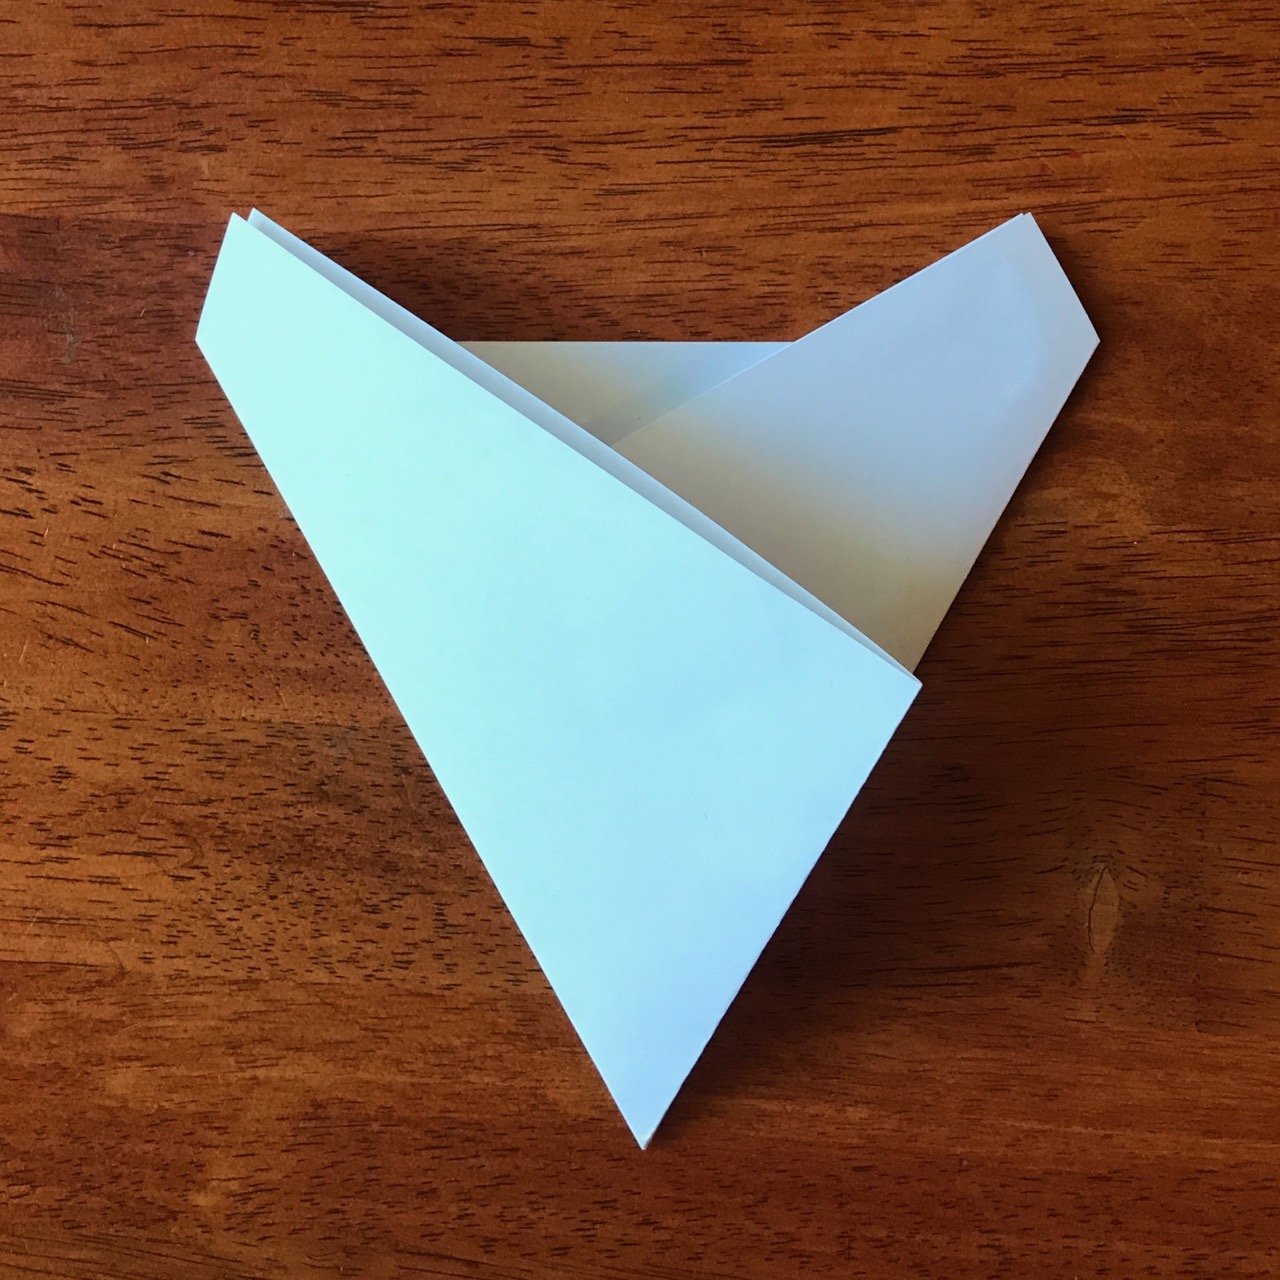
3) Fold your second angle
Repeat the process by bringing the bottom left corner up toward the top right corner, aiming about 1 inch inside of the top right corner. You should now have a piece of paper that looks kind of like a triangle. When you peek inside your triangle the edges of your paper should be snug against the seams of each fold. This is key! If you have gaps, try to re-fold.

4) Fold in half
Fold that triangle in half, making sure you have a nice sharp point. You’re ready to cut!
Tips for cutting your paper snowflake:
Check your fold before you cut! If you see gaps or your paper hangs over on one edge, fold it again. Try to get a crisp point on the end, and line up the edges exactly.
Sketch out your design first: I always sketch my designs in a notebook first to see what I want to cut out and what I’d like to keep. It’s helpful for working out your positive & negative space before you’re cutting on the fly.
When in doubt, give yourself more room: If you feel like you’re getting close to the edge, give yourself a buffer. There’s nothing worse than working hard to cut out a snowman snowflake, only to unfold it and find out you’ve decapitated one!
Start with patterns and work your way up: Start by practicing with patterns (I have plenty in my $1 Print-N-Cut shop!) and work your way up to designing your own snowflakes. You’ll get the hang of it quickly!

Ready for more fun?
Try out some snowflake patterns! They include instructions on how to fold your snowflake to have six points, and easy-to-follow templates that show you exactly where to cut.
Happy snipping!! :)